(Warning pictures!) Tilt column/ cruise control swap

Inside the cab...appearance, repair, upgrades

Moderator: FORDification

Post Reply
User avatar
Happy_Camper
Preferred User
Preferred User
Posts: 341
Joined: Thu Oct 23, 2008 10:46 pm

(Warning pictures!) Tilt column/ cruise control swap

Post by Happy_Camper »

Well, I'm finally getting going on the tilt column swap and cruise control install. :)
A huge shout out to Hawkrod, for his help on some questions I've had. :thup:
BTW: this is just the way I'm doing it, not necessarily the best or fastest. :hmm: I couldn't find any detailed pictures, so thought I'd post some in case it might help others.
I found a '79 F250 Lariet at the local wrecking yard, and was able to get the tilt column, and cruise control system. Someone had all ready robbed the carb chain, and cut the power leads (I think in order to scavenge the ignition switch). Those two items should be pretty minimal.
After getting some great information from Hawkrod, I decided to use the original column mounted neutral safety-reverse switch.
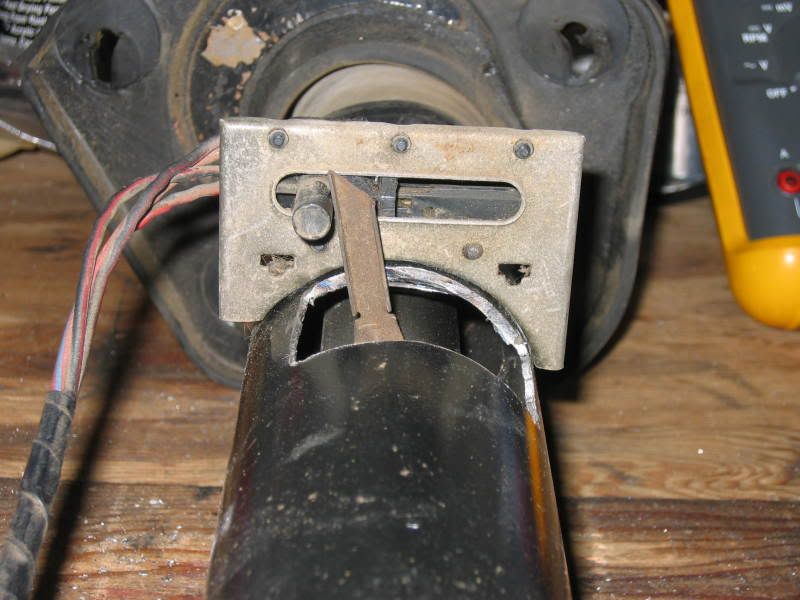
Here it is on the '79 column

Image

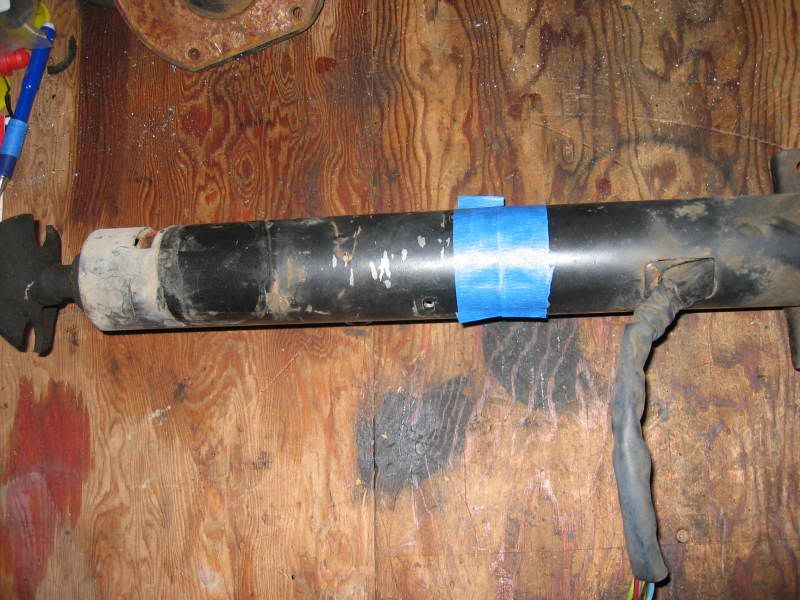
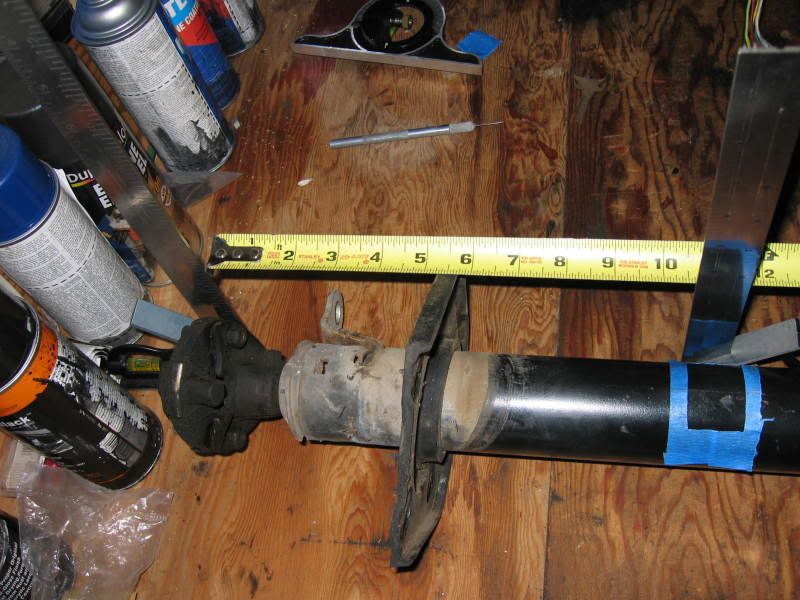
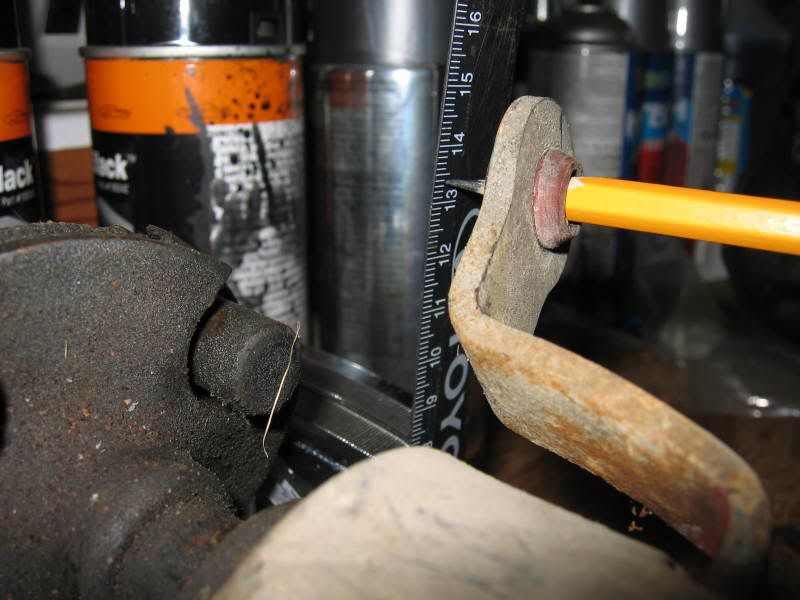
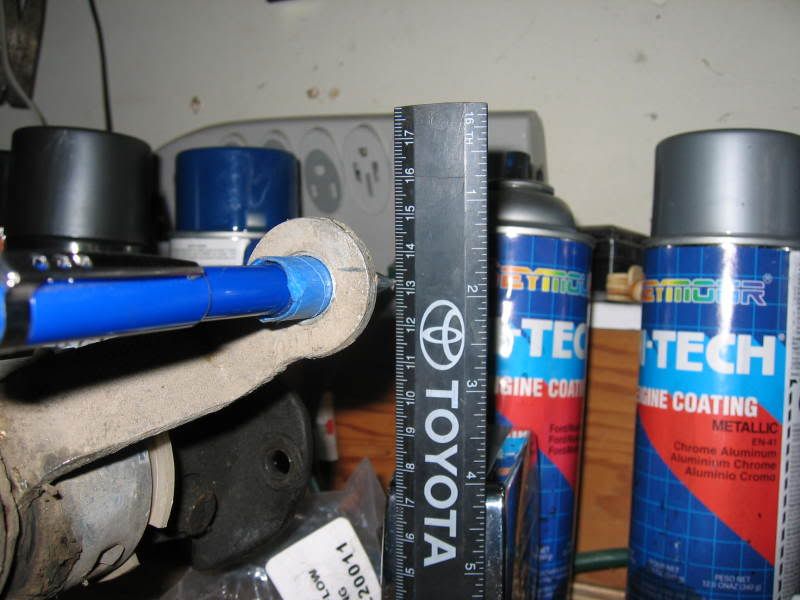
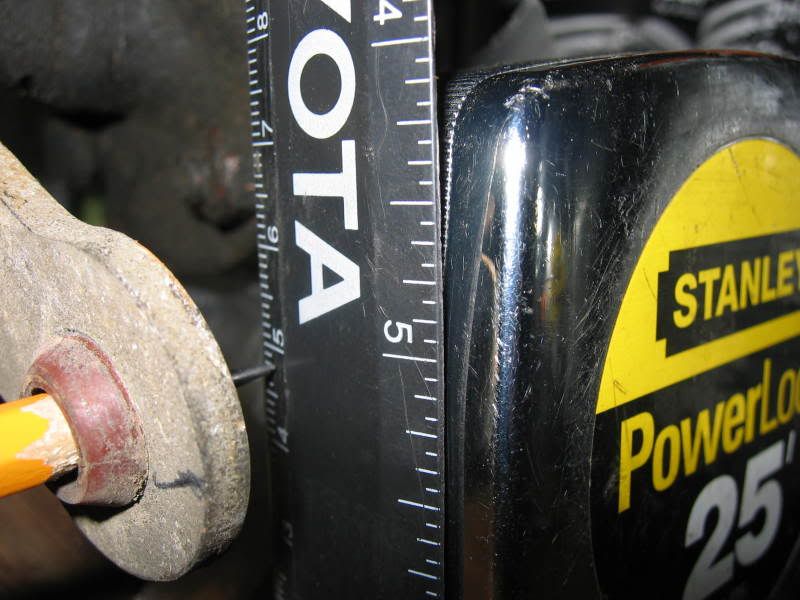
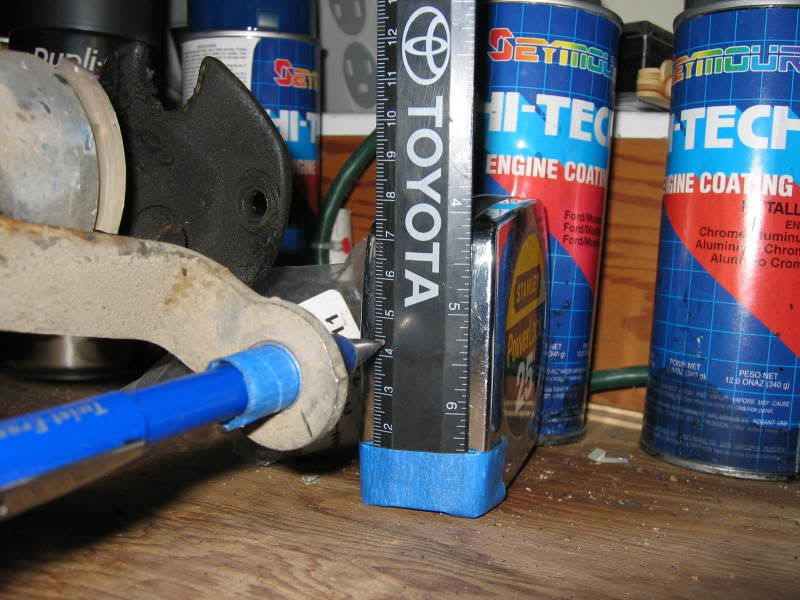
In order to make the cut, I set both columns side by side on the bench, and took measurements from the rag joint flange back. (10-1/2"). Then drew a line down the top of both columns. You can see that the rectangular hole is offset to the right.
The blue masking tape is laid over the hole on the '72 column after removing the switch and flag. I drew match marks on the tape then used an exacto knife to cut the opening out of the tape. Took the tape off and laid it on the '79 column with the match marks lined up, and with the opening starting 10-1/2" from the rag joint.
Image

Image

Drilling the flag holes are a bit of fun. Just have to pay close attention to detail here. Here is a Picture of the flag in the '72 column.

Image

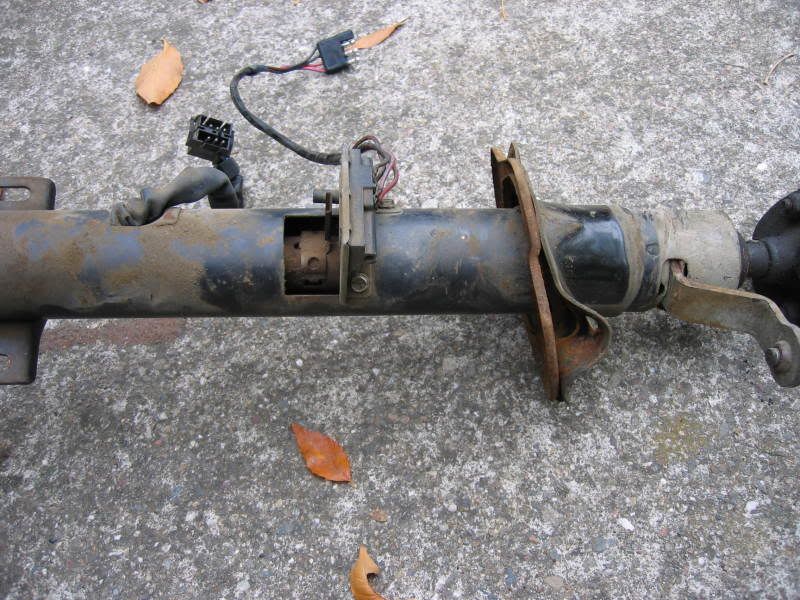
I used a small drill bit to drill the 4 corners of the outer tube, so as not to create stress riser points. Then used a disc to cut out the rectangle
So now the inner shift tube is exposed, and it was just a matter of drilling two elongated holes (one at each end for the flag to attach, and a center locating hole. Shifting the column all the way to 1st gear allowed me to get a center punch in on an angle for the left side hole, and get enough of a divot, that the bit took hold. It's a tight fit, but not difficult. The top locating hole was easy. The right side with the shifter in park was a bit of an angle, but thanks to a good center punch, it went well. The flag needs to be very secure, so after drilling the left elongated hole, I put the flag on the tube and pushed down to really stretch it out. This puts the right side elongated hole far enough away that the flag is very secure. I marked the top center hole at this time.

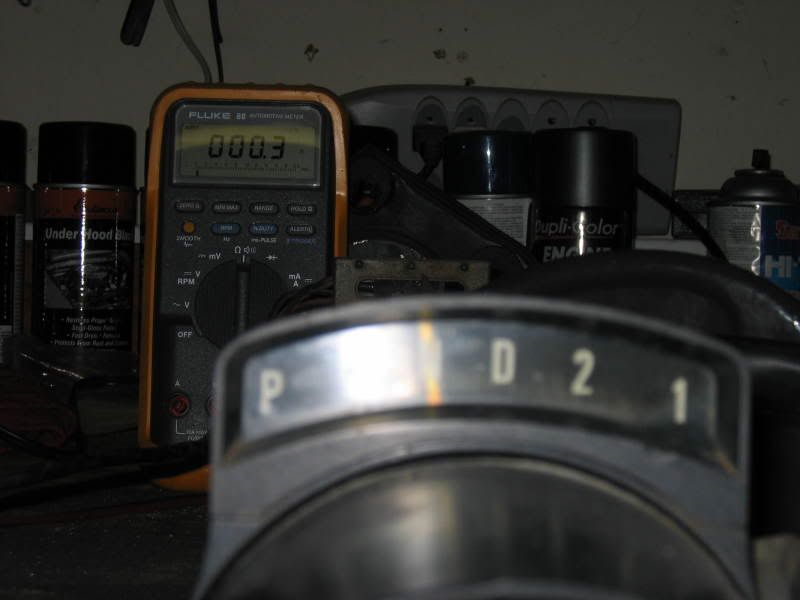
The switch mounts with two self taping sheet metal screws, and has oblonged slots for adjustment. I put the shifter in reverse, and used the multi-meter to find the center of the switch contacts, and marked the tube. Drilled the holes then mounted the switch and adjusted.
Found out the switch is pretty worn out, and I have just ordered an OEM NOS switch, But as you can see in these two pictures, it still functions:
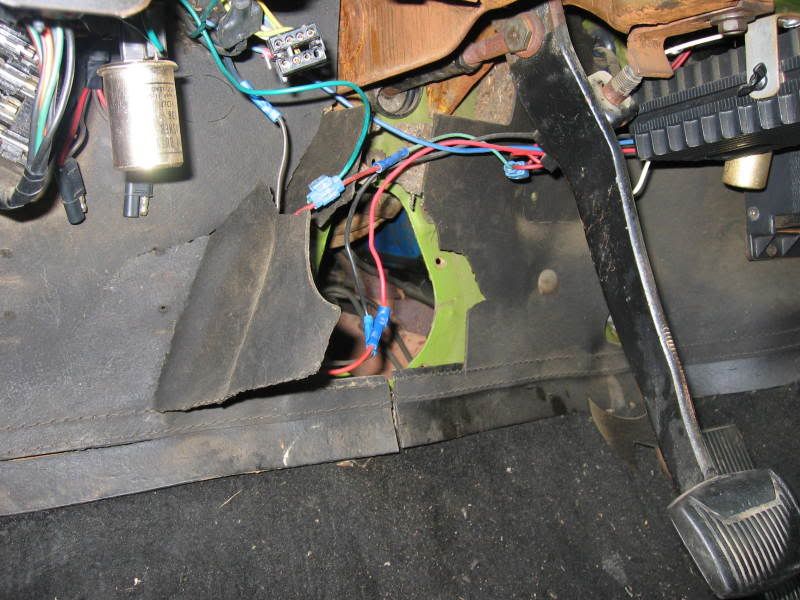
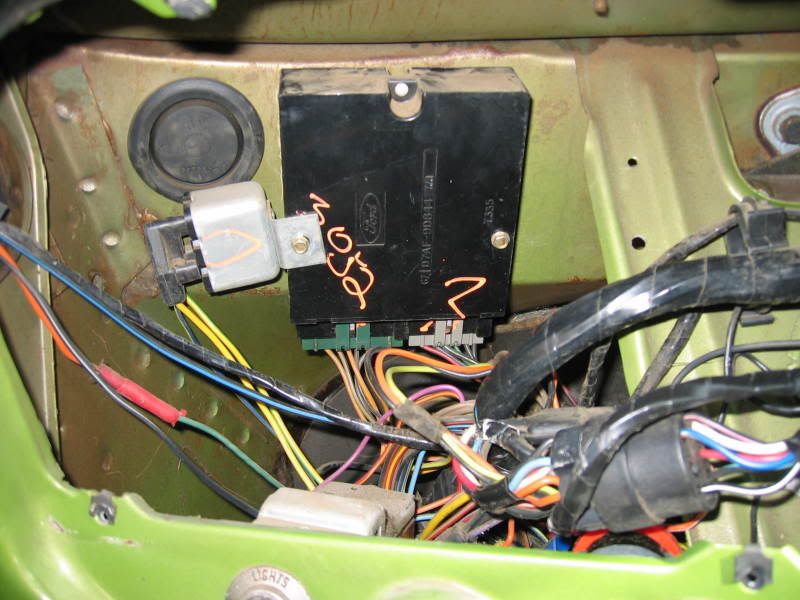
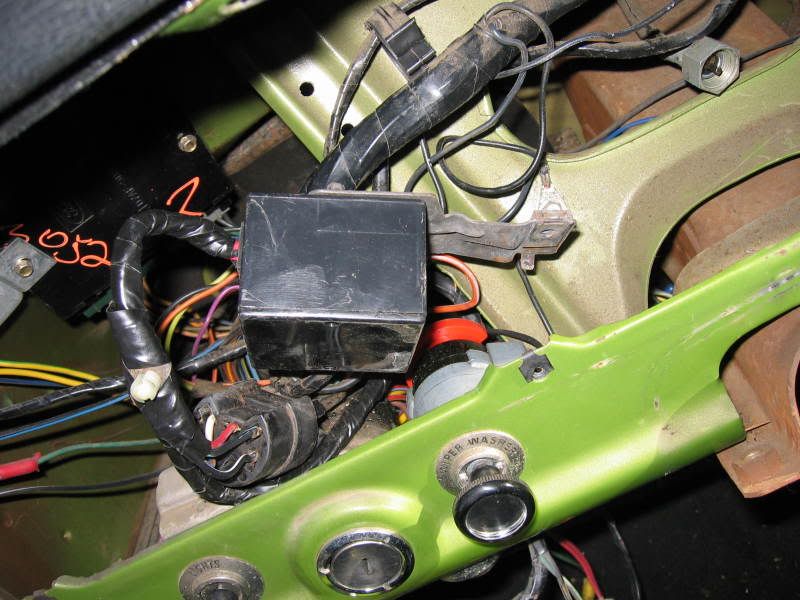
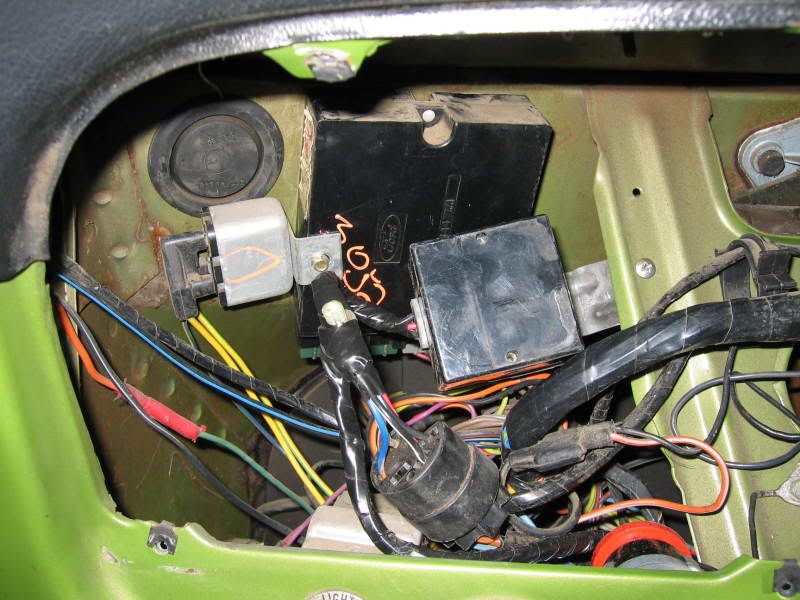
Image

Image

Wiring time :D Normally wiring is my favorite subject, but I couldn't find a correct '79 schematic with cruise. The library was missing the book, and all the online resources I found didn't match. After a lot of messing around, I finally figured out what I'm hoping is correct. I'll post the color combinations when I know it's right.
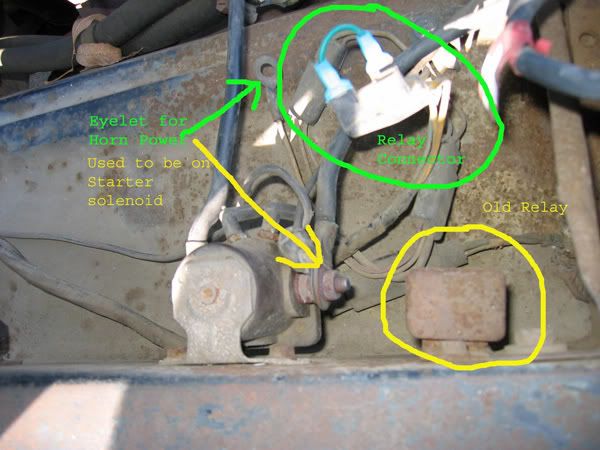
Here's a shot of the cruise control harness. As you can see I was able to snag the harness conector so that I could solder it to the stock '72 conector. I need the additional length to mount the control module and horn relay in the upper left corner behind the dash (same place it was in the '79).

Image

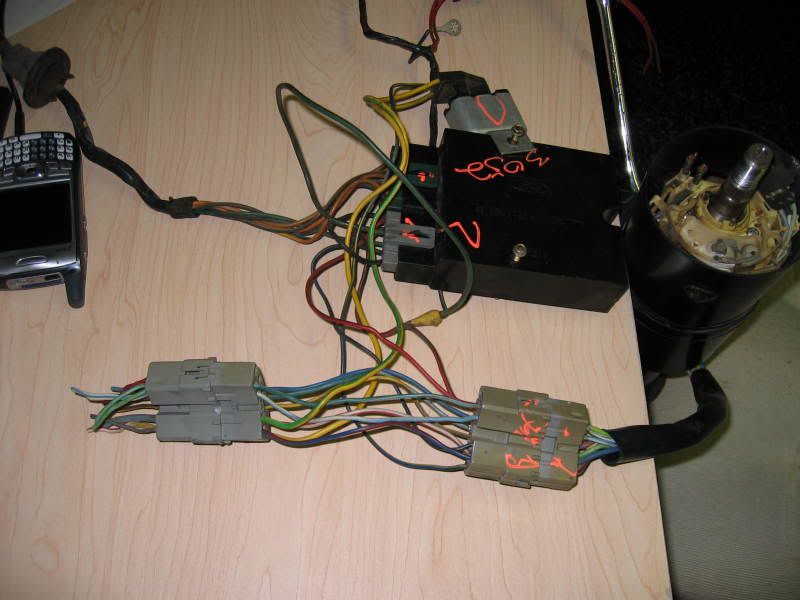
And here is my "pigtail" conector. ***Note: In this picture I have incorrectly soldered the white wire ('79 connector) to the Y-Bk of the '72 connector, and the Green of the '72 connector to the Y-Bk of the '79 connector. I fixed this when I realized my mistake. :oops: All Correct wire connections for the lights are listed in follow up post below.

Image

For the shift indicator light (blue wire with red stripe), I made a "Y" pigtail with two female bullet connectors on the arms, and a male bullet connector on the leg. Then unplugged the cigar lighter light and put the "Y" pigtail in series.

Another issue I noticed is that the '79 shifter has just more than 5mm additional throw in comparison to the '72. According to Hawkrod, he has not seen a problem with this in any of the conversions he has done. He also says the '79 firewall seal fits fine. So, I'm going to try it. If I'm not comfortable with either one, I'll pull out the column, swap the seal and shorten radius of the "z" shaped lever (by heating, bending a quenching the lever). Making either of these changes means dissassembling the column. So I'm hoping to share in Hawkrod's good fortune. :thup:
The pictures with the yellow pencil is the '72 column. The pictures with the blue mechanical pencil is the '79 column.

Image

Image

Image

Image

Steering wheel differences:
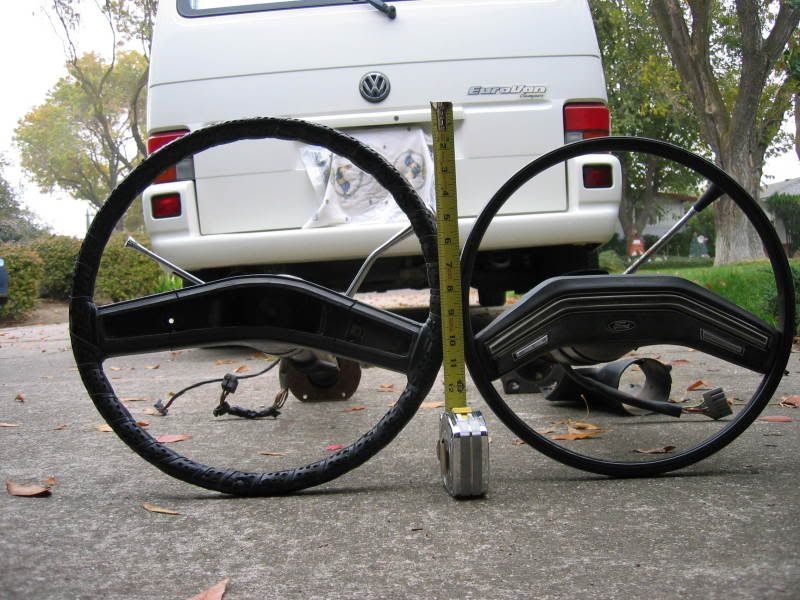
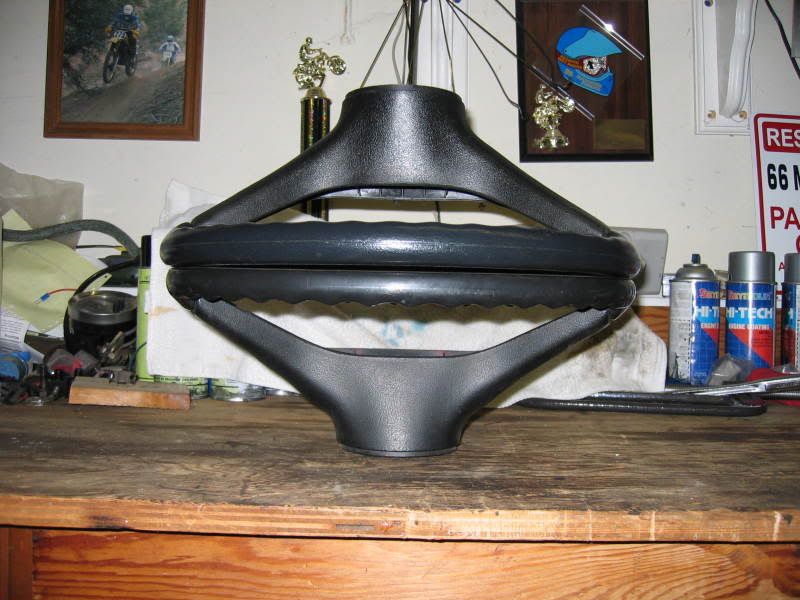
I now have three steering wheels. The '72, '79 and an early 80's Bronco (Simulated leather and wood grain). All three wheels fit on both the '72 and the '79 shaft, but the '72 wheel would not work on the '79 column as there is no way to cancel the turn signals, single horn contact, and it sit's too deep in the column. The '79 and early 80's Bronco wheel are interchangeable with each other, except that the Bronco wheel has "Resume" feature. Neither can be used on the '72 column because of the turn signal cancelation issue, horn issue, and asthetics of the gap at the hub. I mic'd the splined portion of the shafts, there is a slight difference, but the taper makes up for the difference in diameter. Spline count was the same.
The '72 wheel is 16" diameter, the 79 truck and early 80s Bronco wheel are both 15" diameter. More room for the thighs, but the sit exactly the same distance from the gut. :doh:
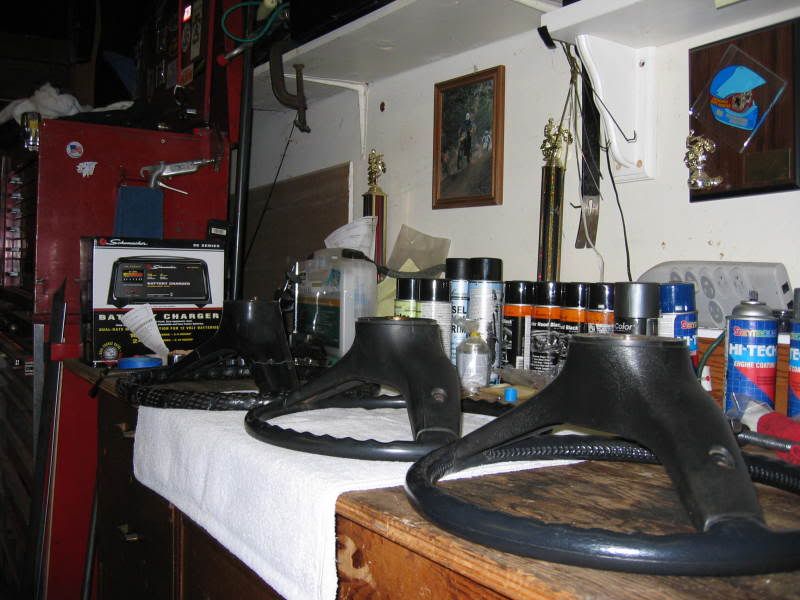
Here are some pictures of the wheels. The big wrapped wheel is the '72. The smaller diameter thick wheel is the Bronco, and the smaller thin wheel is the '79. I'm thinking of getting a leather wrap and using the '79 wheel with the Bronco horn pad.

Image

Image

Image

Image

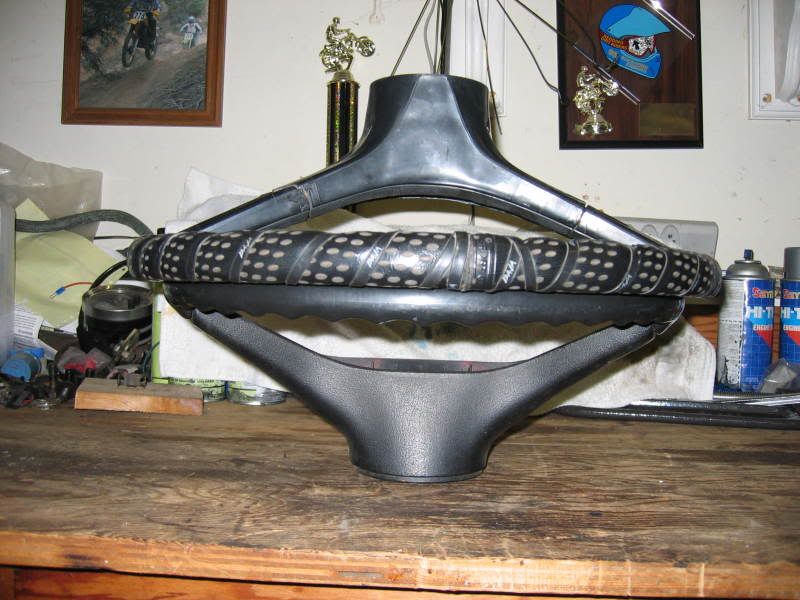
The Horn pads are interchangeable between the 79 wheel and Bronco wheel, except the Resume feature will not work on the '79 cruise control. The rest of the switches work the same way.
On switch--- yellow to Blue wires 0 Ohms with button pressed
Off switch--- Black to Blue wires 0 Ohms with button pressed
Horn switch--- Black to Yellow wires 0 Ohms with button pressed
Coast switch--- Black to Yellow wires 120 Ohms with button pressed
Set-Accel switch--- Black to Yellow wires 680 Ohms with button pressed
Resume switch--- Black to Yellow wires 2,200 Ohms with button pressed

I did a search and couldn't find this kind of information, so I thought it might be of help. When I mount the module, horn relay and column, I'll update this with some more pictures. And when I'm sure about the wiring, I'll post the final correct configuration.
Last edited by Happy_Camper on Sat Mar 07, 2009 3:00 pm, edited 3 times in total.
Scott
1972 F250 Explorer C/S, 390-2V, Dual exhaust, C6, Goose neck ball in bed
New and improved with Tilt Wheel, Intermittent Wipers, 2005 Bench seat and 5th wheel camper!...
Life is *very* good!
Image
User avatar
AK F100
Preferred User
Preferred User
Posts: 337
Joined: Fri Mar 30, 2007 12:43 pm
Location: Eagle River, AK

Re: (Warning pictures!) Tilt column/ cruise control swap

Post by AK F100 »

:thup: Very nice post. Looks great too. :thup: :thup:
GPBFD Pyro Maniac
Daily Driver: 1974 F100 4x4 (ride'n on 8-Luggers) Build in progress
1997 F-350 Crew Cab 4x4, 7.3L Diesel SOLD
Pile-O-Parts: 1968 F100 - 2WD Shorty SOLD
Looking for a new project 57-60 Ford Truck
User avatar
papabug71
100% FORDified!
100% FORDified!
Posts: 2002
Joined: Mon Oct 13, 2008 11:31 pm
Location: McAlester, Oklahoma

Re: (Warning pictures!) Tilt column/ cruise control swap

Post by papabug71 »

Nice write up!! Congrats on the upgrade. :thup:

Wait....Did you use a Toyota ruler do measure that??

Now its going to be way off!!! :D
Image
Matt
1971 F-100 Sport Custom - My grandpaws truck
Been in the family since 10/3/'71 (Brand spankin' new)
Mine since 5/7/'94
302 / 3 speed / 3:25's
--Currently undergoing full frame off resto/mod--
User avatar
sideoilerfe
Blue Oval Fanatic
Blue Oval Fanatic
Posts: 804
Joined: Tue Sep 11, 2007 10:04 pm
Location: Oregon, Portland

Re: (Warning pictures!) Tilt column/ cruise control swap

Post by sideoilerfe »

Pretty cool. Good job. It's too bad the "resume" won't work but not a big deal. Cool. :thup:
Side oiler FE, see if you can catch me!!!

1970 F250 4x4 390/4spd
1968 F250 4X2 360/C6/No Rust!
User avatar
Happy_Camper
Preferred User
Preferred User
Posts: 341
Joined: Thu Oct 23, 2008 10:46 pm

Re: (Warning pictures!) Tilt column/ cruise control swap

Post by Happy_Camper »

papabug71 wrote:Nice write up!! Congrats on the upgrade. :thup:

Wait....Did you use a Toyota ruler do measure that??

Now its going to be way off!!! :D
Ah HA! I should have known :doh:
I'll bet Hawkrod used a Ford ruler... Well there you go. I can stuff it, adjust it and drive it... just as long as that Toyota ruler didn't give my ford cutties :lol:

Thanks for the comments guys! It's pretty fun, and other than the column support mounted on the engine side of the firewall, it's been pretty easy. That column support was a bit tedious, and very greasy (390 with years of valve cover leakage :cry: ). Hawrod says he doesn't re-install the column support. I probably will, just because I'm stupid that way. :eek:
We'll see. I'm waiting to install the column until I get the new NSS. It's much easier to install and adjust on the bench.
The other thing I found was the paperbacked firewall insulation pad was so dried out, that it broken in pieces. At first I was bummed, but then realized the Ranger XLT has a nice carpet piece up there, so now I have another project for next spring. :roll: That and getting rid of all the blue Scotch-locks that the previous owner did.
Image
Scott
1972 F250 Explorer C/S, 390-2V, Dual exhaust, C6, Goose neck ball in bed
New and improved with Tilt Wheel, Intermittent Wipers, 2005 Bench seat and 5th wheel camper!...
Life is *very* good!
Image
User avatar
Hawkrod
Blue Oval Fanatic
Blue Oval Fanatic
Posts: 939
Joined: Tue Mar 01, 2005 12:17 am
Location: Apple Valley, California
Contact:

Re: (Warning pictures!) Tilt column/ cruise control swap

Post by Hawkrod »

Looks good. Glad I could help. I will also add some more related to the cruise. First off, find a 78/9 Econoline van and use the cruise wiring from that. It is almost identical except it does not have the extra brake light switch so it is easier to install. Also because late models don't use a relay for the horn it is wired hot through the horn but when you install cruise they add a relay back in as you already know. the problem is you already have a relay. All you need to do is remove your existing relay and jumper the wire that comes from under dash harness directly to the horn wire and don't use the hot lead that powers the original relay (can you tell that I have done this too! LOL). Hawkrod
39 Ford Dlx Cpe
59 Tbird 430
60 Lincoln
(2)62 Tbirds
(3)68 Cougar XR7-G's
69 Cougar 428CJ 4 speed
77 1/2 F250 4X4
86 SVO
76 F250 Crew Cab
67 F250 Ranger
http://www.supermotors.org/registry/veh ... 9&detail=1
User avatar
Happy_Camper
Preferred User
Preferred User
Posts: 341
Joined: Thu Oct 23, 2008 10:46 pm

Re: (Warning pictures!) Tilt column/ cruise control swap

Post by Happy_Camper »

Thanks Hawkrod,
Sounds like a great idea for the relay. Makes a simple clean install, and still protects the cruise ECU.
Very cool note about the Econoline. That makes things way easier! I will probaby add a wisker switch for the second brake switch. The weather is turning crappy here, and it will be spring before I get back out to the wrecking yards. Not sure I can wait that long to get the cruise functional.
Just got the new NSS ($36.00 delivered, NOS OEM :D ). If it doesn't rain this weekend, I'll start the installation. If it does rain, I'm screwed until somewhere around the first of the year.
Hawkrod, any chance you've got a '79 F series cruise schematic you'd be willing to post or I could email you for a copy? I'd like to keep it with my service manuals for future repair reference. Otherwise, I'll try to find one, and post it here.
Thanks again!

Scott
Scott
1972 F250 Explorer C/S, 390-2V, Dual exhaust, C6, Goose neck ball in bed
New and improved with Tilt Wheel, Intermittent Wipers, 2005 Bench seat and 5th wheel camper!...
Life is *very* good!
Image
User avatar
Hawkrod
Blue Oval Fanatic
Blue Oval Fanatic
Posts: 939
Joined: Tue Mar 01, 2005 12:17 am
Location: Apple Valley, California
Contact:

Re: (Warning pictures!) Tilt column/ cruise control swap

Post by Hawkrod »

I am pretty sure I have the diagram. Let me dig into it. Unfortunately I won't be able to do it for a few days so try and remind me if I forget. Hawkrod
39 Ford Dlx Cpe
59 Tbird 430
60 Lincoln
(2)62 Tbirds
(3)68 Cougar XR7-G's
69 Cougar 428CJ 4 speed
77 1/2 F250 4X4
86 SVO
76 F250 Crew Cab
67 F250 Ranger
http://www.supermotors.org/registry/veh ... 9&detail=1
User avatar
Happy_Camper
Preferred User
Preferred User
Posts: 341
Joined: Thu Oct 23, 2008 10:46 pm

Re: (Warning pictures!) Tilt column/ cruise control swap

Post by Happy_Camper »

More work accomplished today.

I got the cruise control module, horn relay, and column installed. All the lights now work :woohoo: Due to the previous owner screwing up the horn wires (it appears he lost the horn contact from the turn signal switch and just added a horn button below the dash) by tearing into the stock harness, I have not finished fixing the horn wiring. I'll probably do that this spring when I install the rest of the cruise control components.
***** fixed the horn 3-6-09, and included the fix in the connector list below
The cruise module and horn relay are mounted just like they came out of the '79 Larriet (upper left corner behind the dash)
Image

Because I had originally installed the intermittent wiper timer module in the same area, I had to straighten out the bracket, which gives me about 1/2" clearance between the timer, and the CC module.
Image

Image

So here is the column installed with the Bronco wheel.
Image

At this point, I have not bypassed the dash mounted hazard switch. So to make both front and rear lights flash together for hazard lights, I have to pull the dash switch (activates flasher circuit and front lights), and the hazard switch on the column (activates rear lights).
In order to make the brake lights work, I hooked the Red wire from the cruise control module into the '72 brake light switch power (just used a male spade, and plugged it into the unused '72 stop light switch connector). This makes sure the cruise module goes through the brake/hazard fuse (and is consistent with the '79 wiring), and supplies power to the brake light circuit that goes through the cruise module.
The wiring to make all the lights, and horn work ended up being:

'72<---pigtail--->'79____ Circuit
G<------------->W _______Left rear turn light
Y-Bk<--------->Y-Bk ____Right Rear turn light
G-W<--------->G-W ____Left front turn light
W-B<---------->W-B ____Right Front turn light
B<------------->B _______Power from Turn signal flasher
R-Bk ('72 connector) from Stop Light switch is not used with Cruise. Power is supplied through the cruise control module through it's power lead (red wire) to power the stop lights.
The light blue with red tracer on the '79 side of the pigtail went in series to the cigar lighter light, as per above post.
When I get around to fixing the mess the previous owner made of the horn wiring, I'll post this as well. In the mean time, I think Hawkrod's solution in his post above is the easiest and the best.
*** edit 3/6-09Per Hawkrod's suggestion for the horn:
Tied into the Red wire for the brake light circuit, with the solid yellow wiire from the '79 pigtail. B-Y of '72 pigtail connected to Y-G of '79 pigtail. Disconnected the '72 horn relay mounted near the battery. Jumpered B-Y to Y-G at old relay plug, as per this picture:

Image

With the Bronco steering wheel, and the NOS neutral Safety Switch, so far the whole project cost is about $150.00. I'm figuring another $10.00 for a trip to Ace Hardware to come up with the carburetor linkage chain, and whatever metal is needed to make up the servo bracket. Then Probably another $30.00 for the correct speedo cable.
For ~ $180.00 I get:
Turn signals that actually cancel ('72 switch was broken)
Horn back on the steering wheel
A correctly functioning Neutral Safety Switch ('72 unit was just flat worn out)
A shift indicator ('72 column was missing this) and it lights up!
And... Cruise control, with a nice woodgrain tilt wheel
That makes me pretty happy! :thup:
Scott
Last edited by Happy_Camper on Sat Mar 07, 2009 3:06 pm, edited 2 times in total.
User avatar
Happy_Camper
Preferred User
Preferred User
Posts: 341
Joined: Thu Oct 23, 2008 10:46 pm

Re: (Warning pictures!) Tilt column/ cruise control swap

Post by Happy_Camper »

Afew other small items I forgot to mention above:

1). The '79 column seal does fit very well with one caveat. In order to use the engine side firewall mounted column support (the plate with the clamp) the '79 column seal needs to have the three holes drilled where the screws will come though. Like Hawkrod says, the support is not necessary like it is with the original '72 style of column seal. The '79 firewall seal does an excellent job of supporting the column too.

2). I had a concern above about the additional travel for the shift lever. Again, like Hawkrod says, this doesn't matter. I was able to adjust the rod so that the indicator is on each letter-number with the transmission lever centered in the detent. There is enough slop in the column that the additional throw doesn't matter. Once I quit using the Toyota ruler, everything worked great :lol:

3). Not sure how I would use the '79 column trim piece. As you can see I did not try to install it. I suppose someone with some artistic ability could trim it up (that leaves me out, I'm barely able to draw a straight line :oops: ). I plan on installing a Mustang Rally-Pac to get a tach and clock any way.

4). If working by youself, slide the column through the firewall, and install the two column mount bolts just a couple of turns. Don't worry about trying to align the column to the steer box. Once the two bolts are installed (very loosely), it's easy to go to the engine side and move the column back and forth to slide it on the steer box.

5). Speaking of connecting the column to the steer box, the 12 sided bolt has a 7/16" head. I set the steering so that the bolt head faced the left side of the truck and used a wrench. Would have been easier to buy a 12 sided 7/16" socket and used my air wratchet.

6). Disconnect the shift rod at the transmission before trying to remove the three bolts holding the column support plate to the firewall. If you do this, there is access for an air wratchet for the top and right side bolt. For the left side bolt I used a 3/8" drive wobble socket (bolt head is 1/2"), with a 9" wobble extension on my air wratchet. Take the carriage bolt out of the clamp, and spin the clamp around (think chinese jigsaw puzzle) to get it all the way down to the rag joint, then pry it open as best you can before pulling it off. It's a PITA!

7). A heat gun works great to soften the shift rod grommets (they are a PITA too!) I ended up taking the steering wheel off, and removing the column with the shift rod still attached on both the '72 and the '79. Had I used the heat gun, I *think* the rod would have come out. I was able to install the shift rod after installing the column on re-assembly with a little white grease to ease the way.

8). It was much easier for me to remove the '72 steering wheel and turn signal lever first. And install the Bronco steering wheel and turn signal lever last. Much more room behind, and under, the dash this way.

That's about it. Like I said in the first post, this may not be the best or the fastest way... it's just the way it worked for me. Hawkrod has done more than a few of these, maybe he can chime in with some more tips, and-or better suggestions.

Scott
User avatar
71 LONG BED
100% FORDified!
100% FORDified!
Posts: 1588
Joined: Wed Jun 14, 2006 7:28 am
Location: Hamburg, NJ

Re: (Warning pictures!) Tilt column/ cruise control swap

Post by 71 LONG BED »

Nicely done!! :clap: Makes me want to start collecting pieces for my own.
John Member #1549
71 F100 Sport Custom__________1967 F350 Gone, but not forgotten
Image Image Image
User avatar
Hawkrod
Blue Oval Fanatic
Blue Oval Fanatic
Posts: 939
Joined: Tue Mar 01, 2005 12:17 am
Location: Apple Valley, California
Contact:

Re: (Warning pictures!) Tilt column/ cruise control swap

Post by Hawkrod »

I may have a fix for your column to dash trim but it will be a few weeks before I get the first one done. I am making a cover to fit and will be selling them if it works out well. Hawkrod
39 Ford Dlx Cpe
59 Tbird 430
60 Lincoln
(2)62 Tbirds
(3)68 Cougar XR7-G's
69 Cougar 428CJ 4 speed
77 1/2 F250 4X4
86 SVO
76 F250 Crew Cab
67 F250 Ranger
http://www.supermotors.org/registry/veh ... 9&detail=1
User avatar
td
Blue Oval Guru
Blue Oval Guru
Posts: 1007
Joined: Mon Jun 18, 2007 8:44 pm
Location: Tennessee, Lexington

Re: (Warning pictures!) Tilt column/ cruise control swap

Post by td »

Hawkrod wrote:I may have a fix for your column to dash trim but it will be a few weeks before I get the first one done. I am making a cover to fit and will be selling them if it works out well. Hawkrod
Hawkrod,

as you can see by my pic here i'll want to be added to your list for the column trim. i hope it works out, what do you have planned ?

Image
User avatar
Happy_Camper
Preferred User
Preferred User
Posts: 341
Joined: Thu Oct 23, 2008 10:46 pm

Re: (Warning pictures!) Tilt column/ cruise control swap

Post by Happy_Camper »

Yeah, that would be cool. My goal is to install a reproduction (or used) Rally Pac from a '65 or '66 Mustang. However that still leaves the bottom of the column (where it mounts to the dash) open. And the switch harness is out in the breeze, so to speak. So something to enclose that area would be really nice. Especially if it complements the stock top piece.

Well that was a long winded way of saying, I look forward to seeing what you come up with. Thanks again for the help!
Is it too early to remind you about the '79 schematic :wink:

Scott
stangconv
New Member
New Member
Posts: 204
Joined: Thu Oct 09, 2008 2:55 am
Location: CANADA

Re: (Warning pictures!) Tilt column/ cruise control swap

Post by stangconv »

Count me in hawkrod...

I am gonna need some trim too
Post Reply