I think that is about one of the best looking 4x4's I have seen. Impressed for sure!
Restoration Progress
Moderator: FORDification
- ford4x4fun
- Blue Oval Guru

- Posts: 1468
- Joined: Sun Dec 02, 2007 8:38 pm
- Location: Cadiz, KY
- Contact:
Re: Restoration Progress
Fred!
I think that is about one of the best looking 4x4's I have seen. Impressed for sure!
I think that is about one of the best looking 4x4's I have seen. Impressed for sure!
CNR Radio Instructor
US ARMY Retired
1971 Ford F100 4x4 (390)
2015 Ford F250 Crew Cab 6.7l
US ARMY Retired
1971 Ford F100 4x4 (390)
2015 Ford F250 Crew Cab 6.7l
- robroy
- 100% FORDified!

- Posts: 3768
- Joined: Sun Jul 06, 2008 4:36 pm
- Location: California, Salinas
Re: Restoration Progress
Good day Fred!
WOW--definitely one of the finest trucks on here! I'm amazed that you were able to do that in sixteen months, but I guess that's what happens when you've got plenty of know-how, determination and resources. Heavy on the know-how I'll bet.
I like the name Smokey J--that's funny and unusual.
May I ask three questions?
Robroy
WOW--definitely one of the finest trucks on here! I'm amazed that you were able to do that in sixteen months, but I guess that's what happens when you've got plenty of know-how, determination and resources. Heavy on the know-how I'll bet.
I like the name Smokey J--that's funny and unusual.
May I ask three questions?
- I love the gray finish on your shift canes, shown in this photo. What kind of finish is that, and exactly how did you put it on? Is it tough enough to keep from wearing off around the handles?
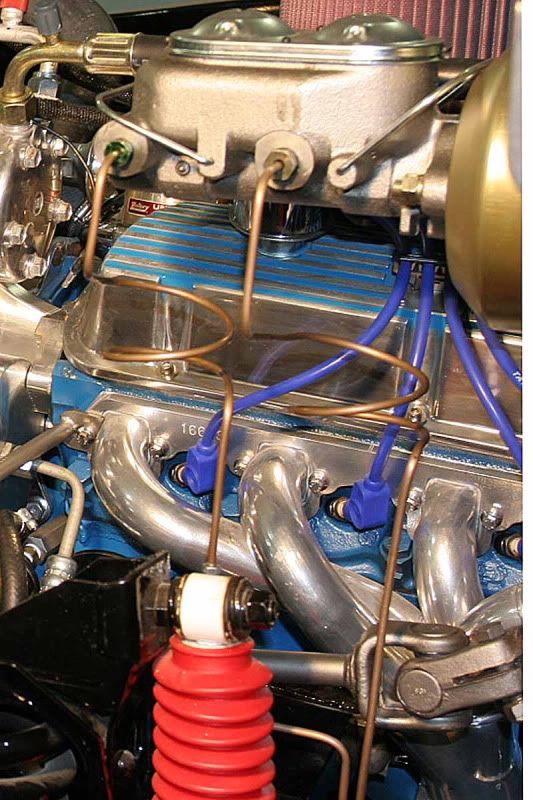
- How in the world did you bend your brake lines so beautifully? Did you learn to do that just by practice, or did you use special equipment? I feel that no matter how much effort I put in, my brake lines inevitably resemble aerial photos of the Amazon river, or the path that Root Beer takes when it's dumped on a sloped Japanese rock garden.
- If you're comfortable sharing this information with us, may we know the total investment in this show truck? $40,000? I've always been curious how much it costs for experienced guys to put together vehicles like this. I know I spend much more than I need to, because I make so many expensive mistakes (inexperience).
Robroy
-
olivof
- New Member

- Posts: 40
- Joined: Sat Jan 30, 2010 10:56 am
- Location: Chiefland, Fl.
Re: Restoration Progress
Hi Robroy,
I have no problem sharing any information shown in the images you see. The things I have learned in the past 60 years do not belong to me so passing them on to anyone that can use them and improve on them brings me pleasure.
The finish on the canes is a color that ford calls argent, used on wheels and valances. It can be purchased in spray cans. It lays down with a semigloss finish. So to make it sorta pop out and make it look rich I will apply a 2K clear. That helps keep it scratch resistent, easy to clean and pleasing to the eye.
The bending of the brake lines does take a slight amount of practice, naturally the smaller the line the tighter the radius, 3/16's for the disc brakes will make a tighter bend the old fashioned way then any high dollar bender you could buy. To see just how much of a bend you can make without kinking or cobra necking the line buy a 3ft. lenght to practice with. With an old deep well socket starting out with a 1" diameter, clamp it very tight in your vise in a vertical position leaving as much sticking up as possible. Apply as much pressure against the socket starting at a point in the tubing that will give you good leverage on both sides, begin to roll the tubing around the socket very slowly being carefull to maintain the diameter of the tubing to prevent kinks or cobra necks, you will be amazed how tight of a turn you can begin to create. When forming a line for application I will take a length of 1/8th aluminum welding rod, (buy it at most NAPA stores or welding supply) form it in the shape you want your brake line to be when finished again using the socket. Make the ends longer then needed then snip them off when you are satisfied, be sure to allow 3/16's for double flares. It is possible the make 3/16's tubing form a 180 around a 3/4" socket. You can purchase copper coated steel alloy brake line from NAPA, (You can see it coming off the master cylinder on my job), if you need to make runs longer then the 6ft. maximum length steel line. Now that material is a pleasure to work with and when you are finished you can polish it to look like pure copper. If your NAPA store says, "no such thing" find another store.
I hope this info. helps. Anything else you have interest in don't hesitate to ask.
Thanks to all you truck & car buffs.
Fred..
-
olivof
- New Member

- Posts: 40
- Joined: Sat Jan 30, 2010 10:56 am
- Location: Chiefland, Fl.
Re: Restoration Progress
Robroy,
This is a better view of the copper coated steel line.

This is a better view of the copper coated steel line.

- marvin2
- Blue Oval Fan

- Posts: 536
- Joined: Fri Jan 23, 2009 11:25 am
Re: Restoration Progress
Unbelievable truck man...great job. What did you do for inserts in the grille, obviously those aren't the typical gray plastic pieces?
- cowbay
- Preferred User

- Posts: 447
- Joined: Fri Mar 18, 2011 5:04 am
- Location: Westbury NY
Re: Restoration Progress
"If it can't be fixed with a hammer, then it is an electrical problem"
69 Ford F100 Ranger 390 3spd with overdrive
63 Chevy Impala 327 with 4spd. In the family since brand new. Over 280,00 miles
69 Ford F100 Ranger 390 3spd with overdrive
63 Chevy Impala 327 with 4spd. In the family since brand new. Over 280,00 miles
-
olivof
- New Member

- Posts: 40
- Joined: Sat Jan 30, 2010 10:56 am
- Location: Chiefland, Fl.
Re: Restoration Progress
The Grill inserts are available in chrome from Dennis Carpenter.
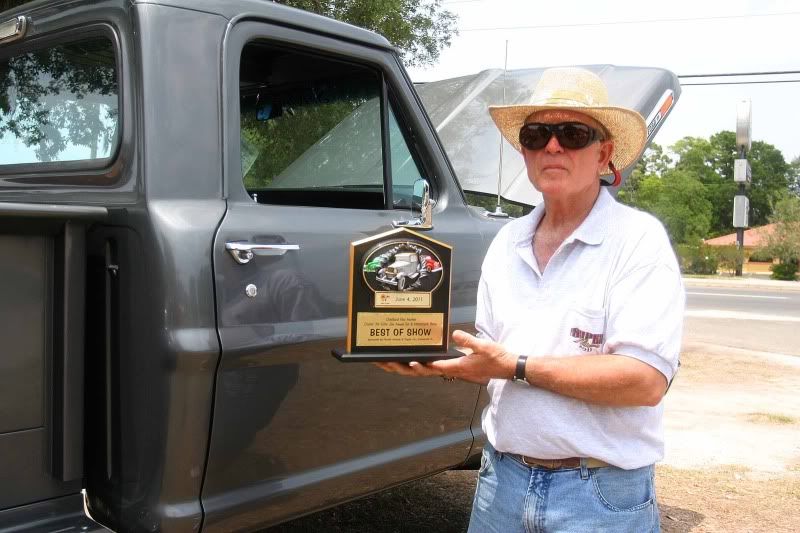
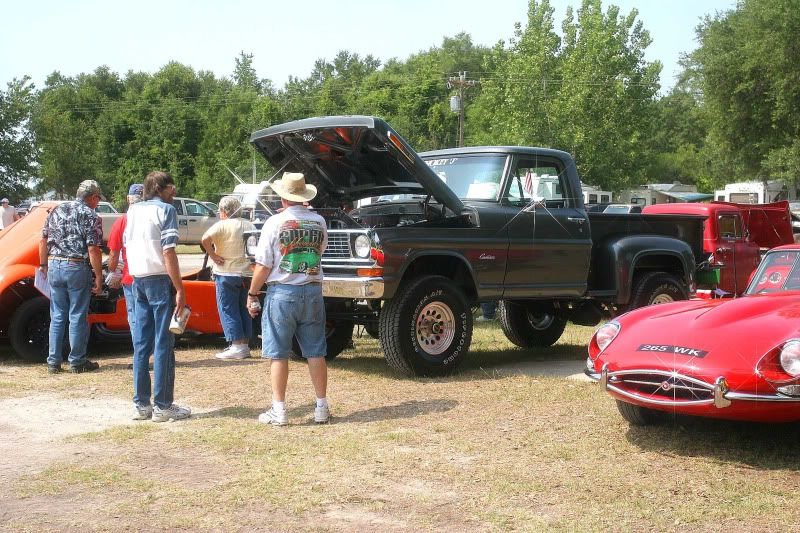
First show out of the shop the truck took best of show out of 95 fine cars and trucks.
The owner just about fell over when his name was called out.
Thanks for all the fine comments.


First show out of the shop the truck took best of show out of 95 fine cars and trucks.
The owner just about fell over when his name was called out.
Thanks for all the fine comments.


- 390bump
- Blue Oval Fan

- Posts: 510
- Joined: Fri Dec 17, 2010 8:17 pm
- Location: CA Bay Area
Re: Restoration Progress
Those judges were able to see the quality workmanship! Congrats 
-
Tregs
- New Member

- Posts: 9
- Joined: Sat May 28, 2011 9:49 pm
Re: Restoration Progress
congrats on the truck it looks awsome . could you tell me what colour gray you used ?
-
olivof
- New Member

- Posts: 40
- Joined: Sat Jan 30, 2010 10:56 am
- Location: Chiefland, Fl.
Re: Restoration Progress
The color is "Smoke Poly", used on 1988 mustangs....
- robroy
- 100% FORDified!

- Posts: 3768
- Joined: Sun Jul 06, 2008 4:36 pm
- Location: California, Salinas
Re: Restoration Progress
Good morning Fred,
I'm sorry for neglecting to thank you for the quality replies you wrote to my questions back in May! Those copper-coated brake lines are really something; I'd never heard of them before.
Have you continued to show your truck this summer? Any more awards?
Thanks very much Fred,
Robroy
I'm sorry for neglecting to thank you for the quality replies you wrote to my questions back in May! Those copper-coated brake lines are really something; I'd never heard of them before.
Have you continued to show your truck this summer? Any more awards?
Thanks very much Fred,
Robroy
- robroy
- 100% FORDified!

- Posts: 3768
- Joined: Sun Jul 06, 2008 4:36 pm
- Location: California, Salinas
Re: Restoration Progress
Good morning Fred!
I've been looking at your great photos again and have come up with another question for you!
I like those metal trim pieces you've installed at the base of your shifter canes, shown in this photo. Are those Ford trim pieces, or did you custom make those?
I'm preparing to assemble my floor mat and shifter boot, and I'm not certain how it originally looked from Ford. If those trim pieces were options I might try to seek them out.
Thanks again Fred for all of the wonderful photos and detailed advice,
Robroy
-
olivof
- New Member

- Posts: 40
- Joined: Sat Jan 30, 2010 10:56 am
- Location: Chiefland, Fl.
Re: Restoration Progress
Hi Robroy,
Those shifter base plates I made on a milling machine out of 1/4" aluminum. There is a thin stamped out plate from national for the transfer case but nothing made for the trans. shifter boot. I used the base of the boots for a patten then milled the plates out. Just an extra custom attraction. The truck has been in 2 shows, took best of show in both. No more shows until October in our location.
Thank you for your interest.
Fred..
-
Judgement699
- New Member

- Posts: 51
- Joined: Fri Oct 15, 2010 10:39 pm
Re: Restoration Progress
Wow, I have to now go clean my desk because of the drool. That is an amazing ride.... B E A Utiful.
- CNM67
- Preferred User

- Posts: 462
- Joined: Sun May 15, 2011 1:57 pm
- Location: Santa Clarita, CA
